Terminal Emulators and QTP
A Terminal Emulator is a program that allows a computer to access legacy applications running on Mainframe computers. These are various Terminal Emulator applications such as Hummingbird HostExplorer, Attachmate EXTRA!, NetManage RUMBA etc that allow a system to access the applications running on Mainframe machines.
QuickTest Professional provides a Terminal Emulator (TE) Add-in that allows users to use a Terminal Emulator to access and automate Mainframe Applications. The first step to start mainframe application automation using QTP is to configure the TE Add-in with a Terminal Emulator. This article talks about how QTP Terminal Emulator Add-in can be configured for Hummingbird Host Explorer.Note: Users would need QTP Terminal Emulator Add-in License as well as Hummingbird Host Explorer with any Mainframe Application access for TE Add-in configuration.
QTP Terminal Emulators(TE) Add-in Installation
Steps to Install QTP Terminal Emulator(TE) add-in:
1) Open QTP setup.exe and select QuickTest Professional Setup
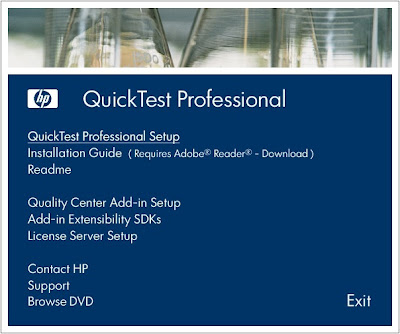 |
| QuickTest Professional Setup |
|
2. From the available add-ins, click TE Add-in drop down and select the option – ‘Entire feature will be installed on local hard drive’.
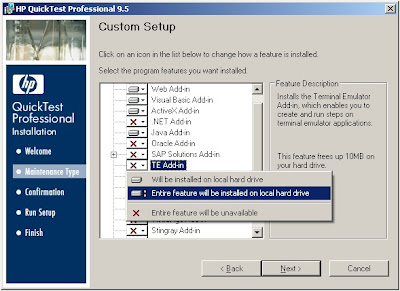 |
| TE Add-in |
3. Follow the Setup Procedure to complete the installation. Once TE Add-in is installed successfully, open QTP. Verify that Terminal Emulators Add-in is displayed in Add-in Manager window. Terminal Emulators Add-in is now successfully installed. Select Terminal Emulators option from the Add-in Manager window. Click OK.
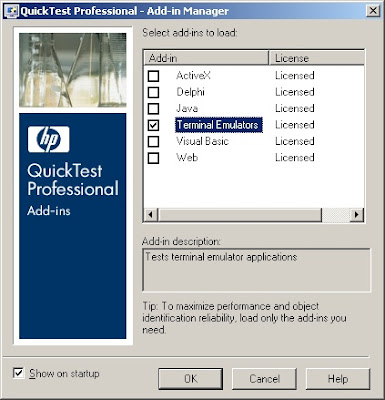 |
| QuickTest Professional – Add-in Manager |
Configuring Host Explorer Session to use with QTP
Steps to configure host explorer so as to make it work with QTP.
1. Open Hummingbird Neighborhood.
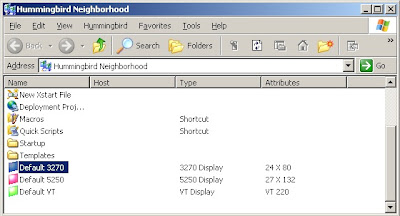 |
| Hummingbird Neighborhood |
2. Open Default 3270.
 |
| Default 3270 |
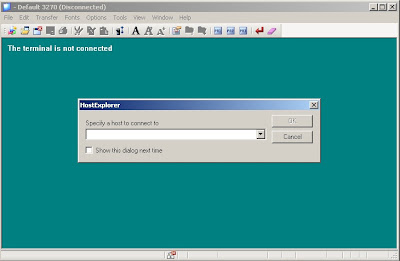
3. If Host Explorer Dialog Box is displayed, click on Cancel button. Select File->New Session. Enter a suitable Profile Name and click on Properties button.
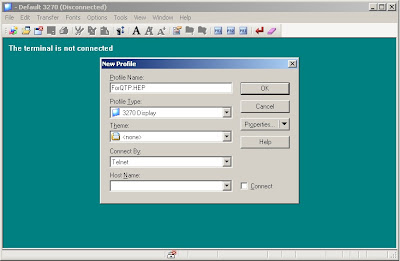 |
| Default 3270 – New Profile |
4. Select TN3270 under Connection node. Click on Add New Host Icon. Enter Host Name and TCP Port. Click on OK button.
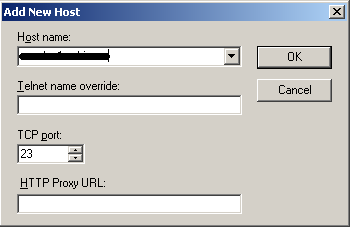 |
| Default 3270 – Add New Host |
|
|
|
5. Select General under Security node. Select the applicable Security Option.
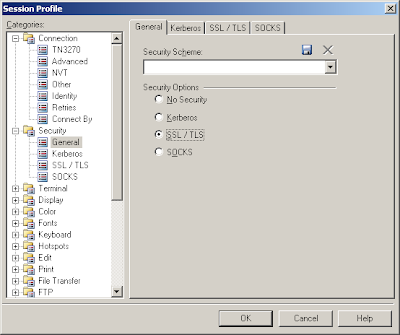 |
| Session Profile |
6. Select API under Terminal Node. Select Session short name as “A”.
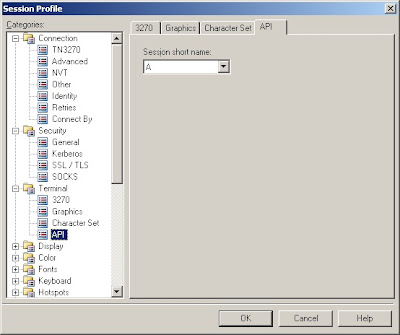 |
| Session Short Name |
7. Click OK and close the Default 3270 window. The new Session will be displayed in the Hummingbird Neighborhood window.
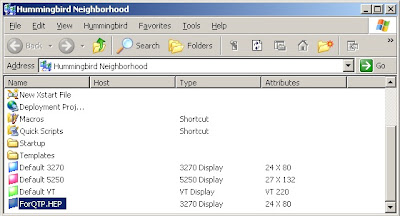 |
| Hummingbird HostExplorer |
8. Open the newly created Host Explorer session. Verify that it is connected properly and the session short name “A” is displayed in the title bar of the window.
 |
| Mainframe Application Login Screen |
QTP Terminal Emulators(TE) Add-in Configuration
Steps to configure Hummingbird Host Explorer in QTP:
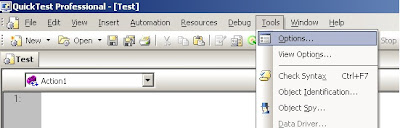
1. Open QTP and Select Tools->Options from the Menu Bar.
 |
| Terminal Emulator Add-in Configuration |
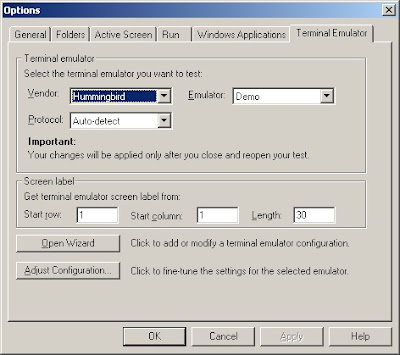
2. From the Options window that is displayed, select Terminal Emulator Tab.
 |
| Terminal Emulator Add-in Configuration |
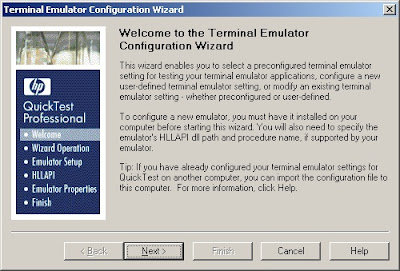
3. Click on Open Wizard button to create a new Terminal Emulator configuration.
 |
| Terminal Emulator Configuration Wizard |
4. Terminal Emulator Configuration Wizard window is displayed. Click on Next button.
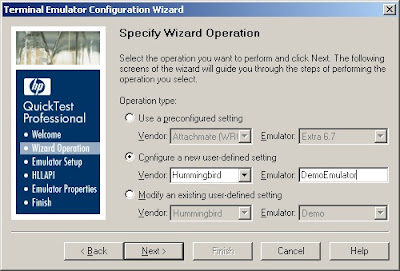
5. Specify Wizard Operation window is displayed. Select ‘Configure a new user-defined setting’ radio button. Select option ‘Hummingbird’ from Vendor Drop Down. Give any suitable name in Emulator field.
 |
| Terminal Emulator Configuration Wizard |
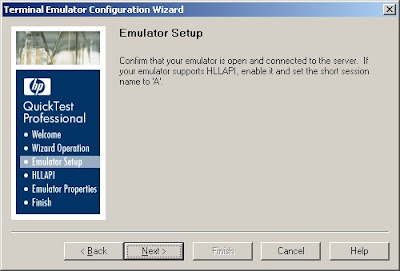
6. Click Next button. Emulator Setup window is displayed.
 |
| Terminal Emulator Configuration Wizard |
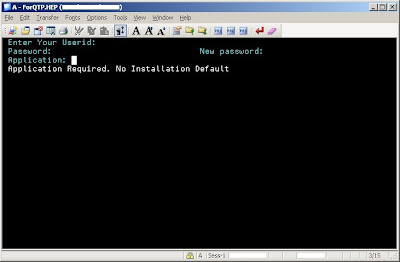
7. Open the Host Explorer Session having Session Short Name “A”.
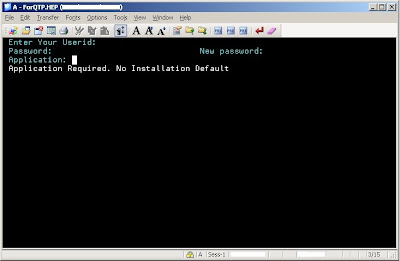 |
| Session Short Name “A” is displayed in the title bar of the window. Here: A – ForQTP.HEP |
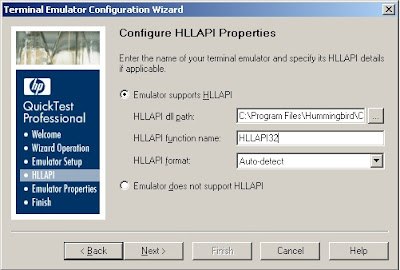
8. After verifying that the Host Explorer Window has Session Short Name “A”, click Next button in the Emulator Setup window. Configure HLLAPI Properties window is displayed.
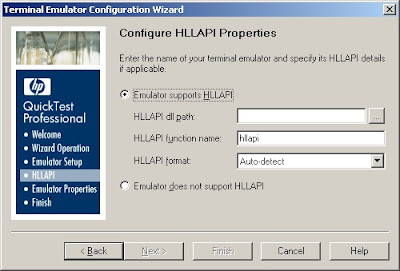 |
| Configure HLLAPI Properties |
9. Click on the (…) button next to ‘HLLAPI dll path:’ field and select the following path –
C:Program FilesHummingbirdConnectivity13.00HostExplorerehllap32.dll
 |
| HLLAPI dll Location |
10. Enter “HLLAPI32” in HLLAPI function name and select Auto-Detect in HLLAPI format field. Click on Next button.
 |
| Configuring HLLAPI Properties |
11. HLLAPI Configuration Test window is displayed.
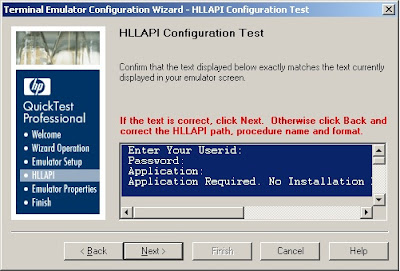 |
| HLLAPI Configuration Test |
12. Verify that the text shown in HLLAPI Configuration Test window matches the text in the Host Explorer window.
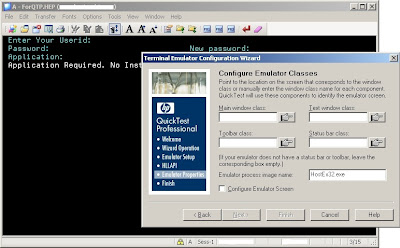
13. Click Next button in HLLAPI Configuration Test window. Configure Emulator Classes window is displayed.
 |
| Configuring Emulator Classes |
14. Configuring the Emulator Screen – Select Host Explorer Window first and select Configure Emulator Classes window over it.
 |
| Configuring Emulator Classes |
a) Main window class: Click on the Hand Icon Button next to ‘Main window class’ field. The mouse pointer icon changes to hand icon. Click the title bar of the Host Explorer Window. Verify that the ‘Main window class’ field contains the value “HostExplorer”.
b) Text window class: Click on the Hand“HEDR”.
c) Toolbar class: Click on the Hand Icon Button next to ‘Toolbar class’ field. The mouse pointer icon changes to hand icon. Click anywhere on the icons in the toolbar in Host Explorer Window. Verify that the ‘Toolbar class’ field contains the value “AfxWnd80s”.
d) Status bar class: Click on the Hand Icon Button next to ‘Status bar class’ field. The mouse pointer icon changes to hand icon. Click anywhere in the Status bar in Host Explorer Window. Verify that the ‘Status bar class’ field contains the value “msctls_statusbar32″
15. After all the fields are configured, the Configure Emulator Classes window will look like this:
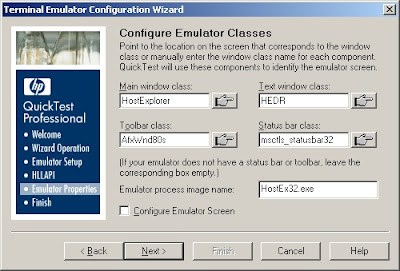 |
| Configure Emulator Classes |
16. Click on Next button. Complete the Terminal Emulator Configuration Wizard window is displayed. If required, save the Terminal Emulator Settings and click on Finish button.
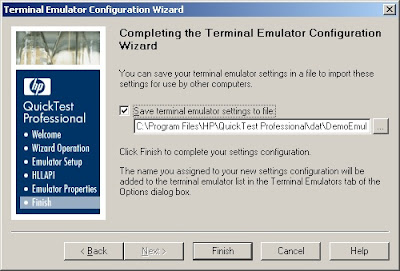 |
| TE Add-in Configuration Wizard |
17. After clicking on Finish button, QTP gets hanged. Go to Task Manager and kill QTP.exe process. Also close the Host Explorer Session.
18. Open QTP again selecting the Terminal Emulators Add-in. Open the Host Explorer window with having Session Shot Name “A”. Select Object Spy from QTP and spy on any field to verify that the objects are identified correctly.
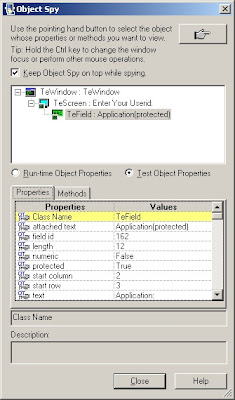 |
| Checking Terminal Emulator Application with Object Spy |