QTP Add-In Manager [2]: How to install or add add-ins other than the default ones in QTP
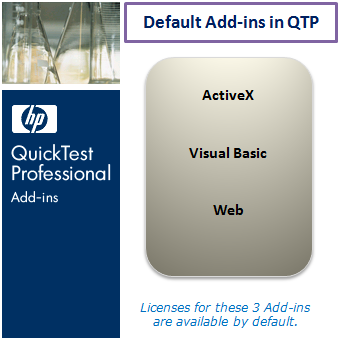
Did you notice that when you install QTP, you have ActiveX, Visual Basic and Web add-ins installed/available by default.
Now there would be many situations where you are working on some application which needs some additional add-ins to be installed. For example, let us assume that you want to automate a Java Application and for that you need to install Java Add-in. You can follow the below mentioned steps to add/install Java Add-in (or for that matter any other add-in) –
1. Go to Control Panel -> Add or Remove Programs and select QuickTest Professional from the list. Click on Change button.

Control Panel
2. After you click on Change button from the Control Panel, QTP Setup Wizard would be displayed.
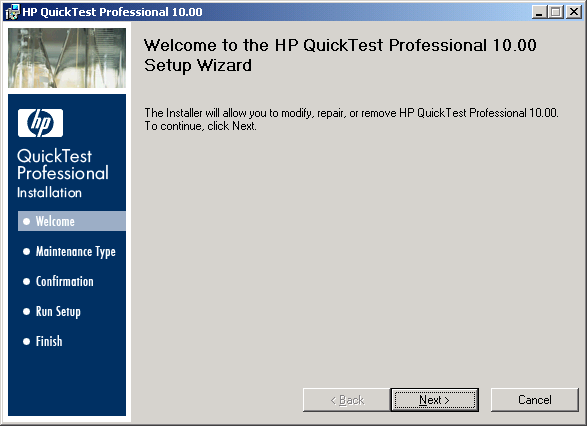
QTP Setup Wizard - Welcome Screen
3. Click on Next button in ‘QTP Setup Wizard – Welcome Screen’. ‘QTP Setup Wizard – Maintenance Type’ screen would be displayed.
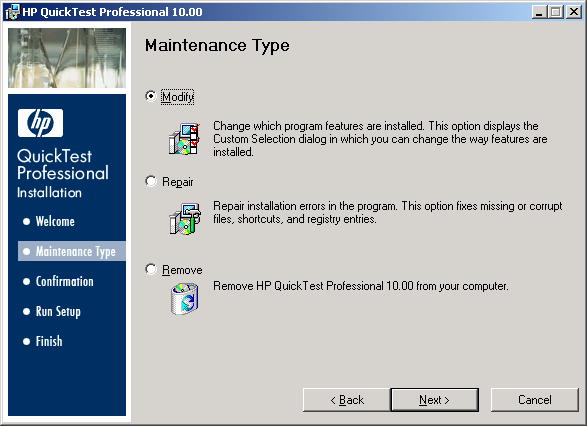
QTP Setup Wizard - Maintenance Type Screen
4. From ‘QTP Setup Wizard – Maintenance Type’ Screen, select Modify radio button and click on Next button. ‘QTP Setup Wizard – Custom Setup’ Screen would be displayed.
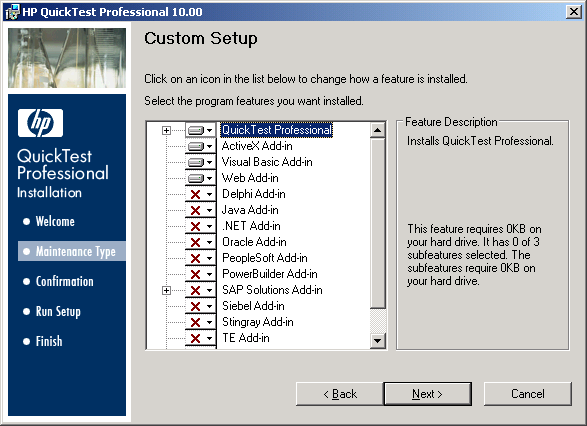
QTP Setup Wizard - Custom Setup
In the above screen, you will notice that all the options other that QuickTest Professional, ActiveX Add-in, Visual Basic Add-in & Web Add-in have a cross mark next to them. This means that the options with cross mark next to them are not currently installed and then ones with no cross mark are currently installed.
5. Click on the small black down arrow next to the Red Cross for Java Add-in. Clicking on it would show a small menu with 3 options as shown in the below image.
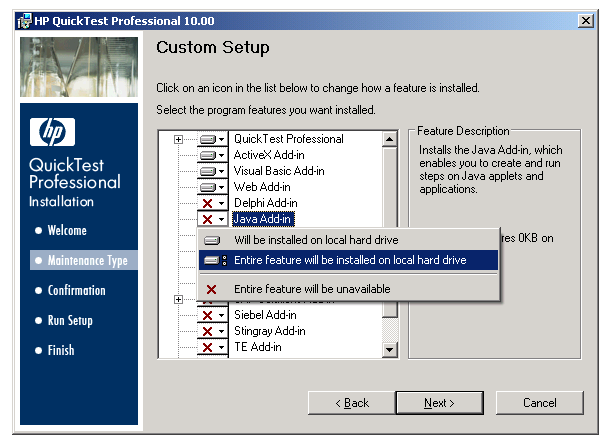
QTP Setup Wizard - Custom Setup
6. From the 3 options that are displayed, select ‘Entire feature will be installed on local hard drive‘. Once this option is selected, you would notice that the cross mark next to Java Add-in is removed.
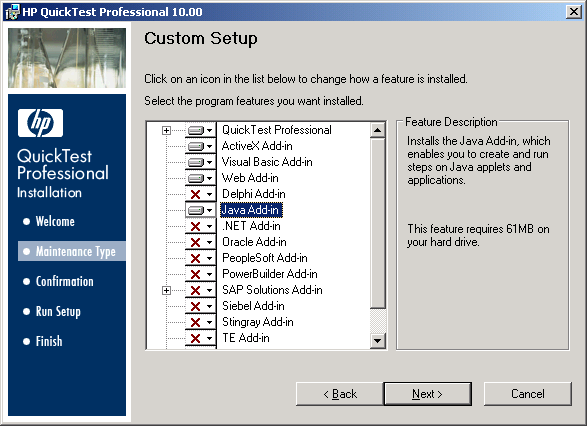
QTP Setup Wizard - Custom Setup
7. Click on Next button twice. QTP would install the Java Add-in and once the installation is finished, you would see the ‘Installation Complete’ screen.
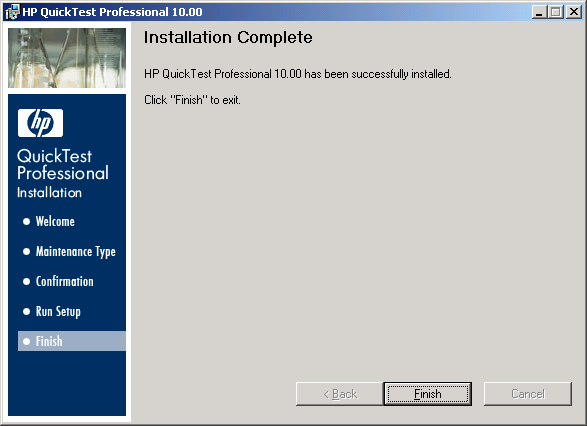
QTP Setup Wizard - Installation Complete
8. Click on Finish button. The Java add-in installation is successfully completed.
9. To see if the newly added add-in is available or not,open QTP and check the Add-in Manager page that comes at Start-up. Here you would be able to see the Java add-in displayed together with the other available add-ins. (If you are not able to view the Add-in Manager page at start-up, read How to Enable or Disable Add-In Manager at Startup in QTP article)
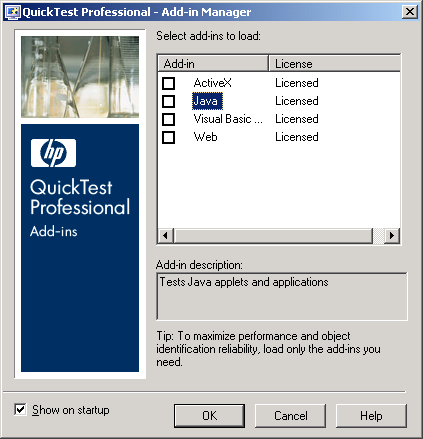
QTP Add-in Manager with newly installed Add-in
Please note that when you add a new add-in (other than the default ones) in QTP, you should make sure beforehand that you have a valid license for that add-in. This is because when you open QTP, it will first check for the license for QTP as well as the installed Add-ins. If you don’t have a valid license for any of the add-ins that you have installed, you will not be able to use that add-in.
If you liked this article, you can join our blog to get free email updates directly in your inbox.



Pingback: QTP Add-In Manager [3]: How to uninstall or remove add-ins from QTP - Automation Repository - Automation Repository()