Did You Know: How QTP identifies Test Result Folders
In the previous article, we had seen how QTP identifies a test folder and distinguishes it from a normal folder. On the same lines, we would see how QTP identifies a test results folder. We will use QTP’s Test Result Deletion tool to illustrate this concept.
QTP checks for the presence of 3 different files/sub-folders in order to differentiate a test results folder from a normal folder. These 3 items are as follows –
- 1) A file named ‘Mediainfo.ini’ in the Test Results folder
- 2) A sub-folder named ‘Report’ in the Test Results folder
- 3) A file named ‘Results.qtp’ or <anyname>.qtp inside ‘Report’ sub-folder
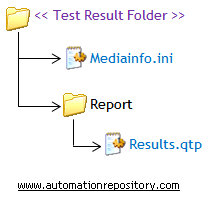
Test Results Folder Structure
If QTP finds all these 3 items in any folder, it treats that folder as a Test Results folder. If any of these items is missing, then it is treated as a normal folder. Even if the folder hierarchy of any of these items is changed, QTP would not recognize it as a Test Results folder.
Please note that in case of Results.qtp file only the file extention is required to decide whether the folder is a results folder or not. But in case of Mediainfo.ini file, the file name as well as the contents inside the file both decide the nature of the folder. In other words, you can have Results.qtp or <somename>.qtp file with any content but the same is not true for Mediainfo.ini file.
Let’s see an example to understand this concept clearly –
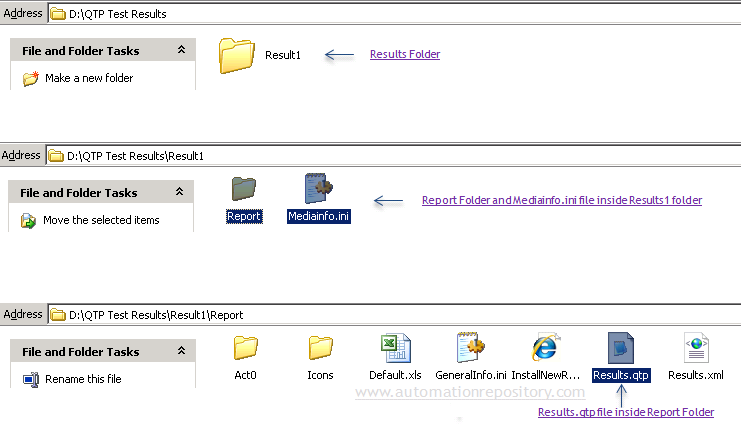
1) We already have a Test Results folder named ‘Result1’ saved in D:\ drive. This Results folder contains all the 3 required items as shown in the below figure.
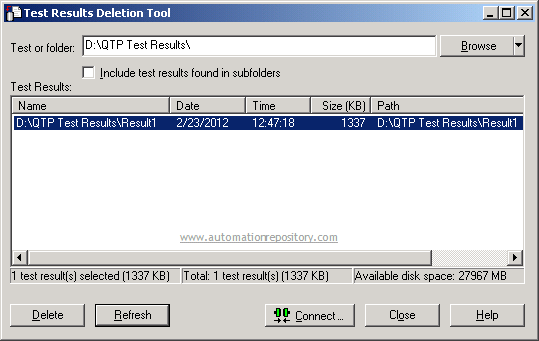
2) Open QTP’s Test Results Deletion tool. Browse using folders option and select the folder above ‘Result1’ folder. QTP identifies ‘Result1’ as as a test result folder and adds it to the Test Results Deletion tool.
3) Delete any of the 3 items or change their hierarchy or rename any of them other than Results.qtp.
4) Again select the folder above ‘Result1’ in Test Results Deletion tool. This time you would notice that QTP doesn’t identify ‘Results1’ folder as a test result folder and hence doesn’t add it to the Results Deletion tool.
5) Create a new Dummy Results folder and do the following –
a) Create a new notepad file with the below contents and save it as ‘Mediainfo.ini’ in the Dummy Results folder.
[Media]
Report = Report
IterDir = Row
b) Create a new sub-folder named ‘Report’ inside the Dummy Results folder.
c) Create a new notepad file and save it as ‘Results.qtp’ or <anyfilename>.qtp inside the ‘Report’ sub-folder.
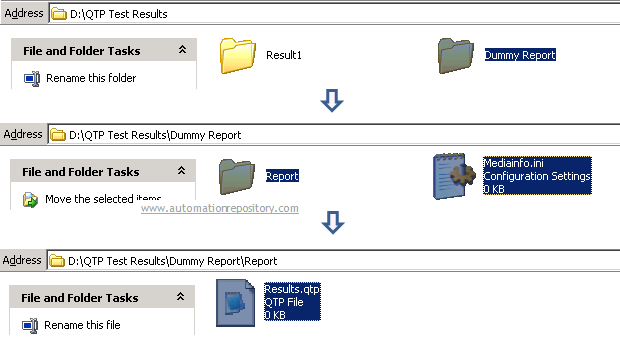
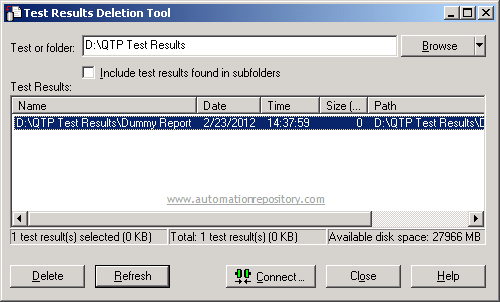
6) Select the folder above the Dummy Results folder in Test Result Deletion tool. You would see that QTP treats the Dummy results folder as a test results folder and adds it to the Results Deletion tool.
This is how a Test Results folder is identified by QTP. You can use this information to create your own Test Results Deletion tool. Do let us know your comments on this. Happy Reading.. :–)
If you enjoyed this article, you can join our blog to get new articles delivered directly in your inbox.


